Monday 10 April 2017

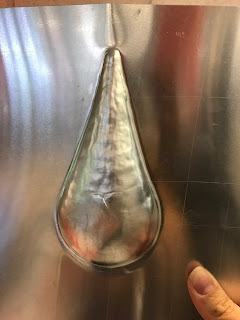
Task 4 - Blister

Used a range of timber tools to create the blister 


First attempt was unsuccessful due to over hammering which caused the metal to split
Second Attempt


Finished off by cutting around the blister using tin snips


Task 3 - Tray


Cut the sheet metal to desired size and marked a border as a guide for the walls of the tray. Cylindrical tools were then used to mark rounded corners. These curves were then cut out using tin snips.

My partner Iris and I created a timber template that was the exact size that we wanted our tray to be to ensure that the final products would be the same. 


First attempt was unsuccessful as I lacked confidence and was scared I was doing it wrong which did happen because I didn't secure the piece tight enough. This meant that the metal sheet shifted and warped.


Second attempt was more successful as I hammered around the timber template with more confidence. Cut off the overhang using tin snips.


First comparison with my partner Iris' tray


Sanded down the edges to get a flat surface


Final comparison of trays with my partner.


Task 2 - Torus

I started off by running the sheet metal through the metal roller, gradually increasing the curvature.


I then hammered out the curve (shown below) using the timber cylinder provided by placing the curve created with the metal roller (shown above) into the cutout. I hammered the edges flat along the cylinder and proceeded to do so until I achieved the desired curve in the below image.


Finally, to refine the edges of the Torus, I hammered it against the thin, metal hook curve to achieve a tight defined curve.


Sunday 9 April 2017

Task 1 - Bowl

Started off by cutting out a circle from sheet metal using tin snips. I then marked out a horizontal and vertical line intersecting at the center of the circle as well as two circles evenly spaced from the center to act as a guide. I proceeded by hammering the edges of the circle to start off the inward curve of the bowl which created ruffles around the rim. I hammered the ruffles down until they had stretched and molded into shape. I then gradually hammered around the bowl towards the center to make the curve of the bowl more pronounced. I continuously hammered around the bowl until I achieved an even surface throughout the bowl.


The English Wheel was then used to smooth out the surface of the bowl, getting rid of the dimples created by the hammers used.


Refined the edges of the bowl to make it as circular as possible using a metal hammer and the metal dome.


Finished off the bowl by sanding down the edges for a clean, even edge.


Created a template to capture the curve of the bowl